Specifications
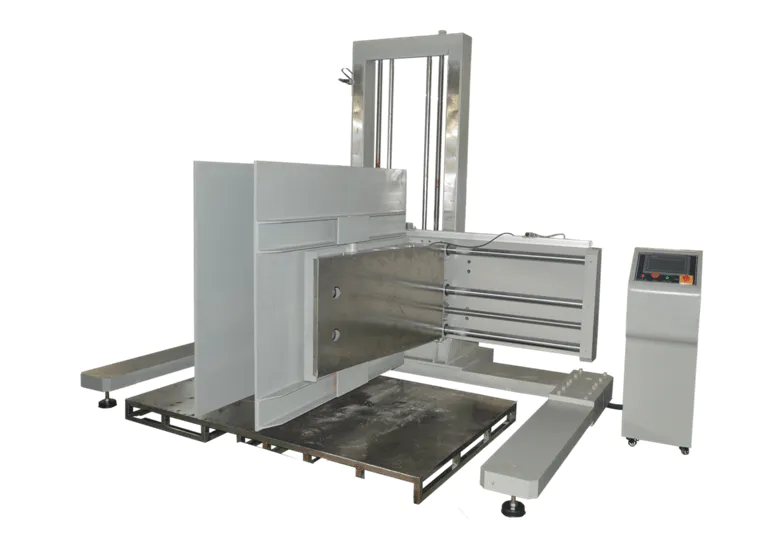
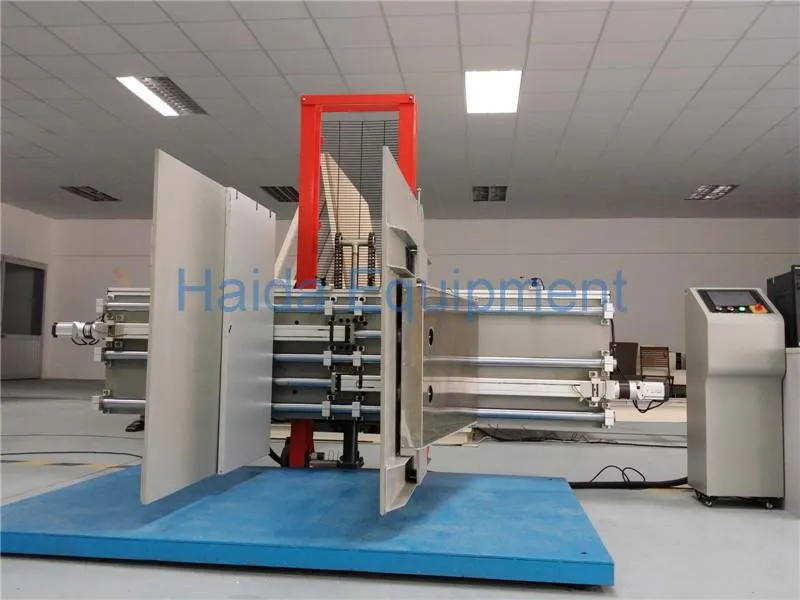
ASTM D6055 PLC control package clamp force testing machine
1.Package clamp testing machine
2.Up to ASTM D6055
3.PLC control
Safety protection
Overload protection, overvoltage protection & limited position protection device
Clamp Compression Testing Method of Large Products
1.Before placing the packaged product between platens, verify that the clamp force using the clamp indicator. The indicator should be placed between the axes of the platen articulation points approximately 1/2 way up the platens.
2.Each time the product is clamped, the force should be applied for a minimum of 15 seconds and not to exceed 1 minute.
3. Apply the clamp force on the sample with the platens resting on the floor and the front edge of the platens flush with the front of the package (see flush platen photo 4). If the package is too large for the clamps to be flush to front edge (i.e., large refrigerator, tractor etc.), clamp as close to the edge as possible.
4. Clamp the product a total of 10 times in the flush orientation.
5. Apply the clamp force on the packaged product with the platens in a 6×6 inch(15.2x15.2cm) offset position(see fig 5 ). Both the horizontal and vertical offset dimensions are measured at the front bottom corner of the platen. If the package is too large for the clamp to be positioned 6-inches from the front edge (i.e., large refrigerator, tractor etc.), clamp as close to this position as possible.
1)Exception number 1: for large products with an obvious, visible external skid(see fig 6), offset clamp testing is not conducted if the product does not extend beyond any part of the skid and there is some form of handling graphic or note that indicates to clamp only from the skid. If there is no graphic or not indicating this or there is some overhang beyond the skid, then the entire clamp test protocol is conducted.
2) Exception number 2: If the product height, when placed in its normal shipping orientation, is ≤ 12 inches, the 6 x6 inch offset testing is not conducted.
6. Clamp the product a total of 10 times with the clamp in the 6 x6 inch offset position.
7. Repeat step 5.2.5 except with a 2 x6 inch offset clamp position. The 2 x6 inch offset is similar to the 6 x6 inch offset except the platens are oriented such that they are 2-inches from the floor and 6-inches back from the package’s front edge. If the package is too large for the clamps to be positioned 2-inches from the front edge (i.e., large refrigerator, tractor etc.), clamp as close to this position as possible.
8. Repeat flush and offset clamping on all other sides of the product that are indicated in the handling graphics as acceptable for clamp handling.
According to verdict standards, if there is one item failed the test, then put forward the “Test Failure Handling Sheet
Main parameter:
Specimen shape | Parallelepiped transport package |
Maximum specimen weight | 600kg |
Clamping pressure force | According to the transport diagram on the test sample, the operator can add 400-3000Lb (adjustable) pressure force on the corresponding surface. |
Clamping plate size | Height 48inch X depth 48inch |
Clamping plate adjustable height | 0~1000mm |
Clamping plate adjustable width | 200~2000mm |
Base plate dimension | 2200 X 2100mm |
Motor | Panasonic Servo Motor |
Accuracy | within ±5% |
Clamping plate requirement | Make the two clamping boards flat and non-deform under work condition (2000 Pounds) and make clamping boards’ parallel and clamping board and land vertical. Clamping board is thicker than 25mm. |
Clamping force rate | 0.25-2.5mm/sec (according ISTA 6- SAMS CLUB) |
Force corrector | It displays force value and is used to calibrate clamping force. |
Calibration accuracy | ±1% F.S |
Device width | Less than 2.5m |
Weight | approx. 2000kg |
Power | 220v/ 60Hz |
Controller: | touch screen type, which can control & display the speed and force |
Function | the clamp can be up and down |
Control | Computer controlled type |
Clamp Compression Testing Method of Small Products
Before clamp testing, verify that the clamp for using the clamp force indicator. The indicator should be placed between the axes of the platen articulation points approximately 1/2 way up the platens.
During clamp compression testing of small products, 4 samples will be utilized as outlined below.
1. If, when oriented for clamp testing (based on the handling graphics) the sides perpendicular to the platens of a single sample ≤ 24” (61cm), then the 4 sample should be placed in a”side by side”oritentation as shown to the fig 1(with 2 samples on the bottom and 2 on the top)
2. If, when oriented for clamp testing the sides perpendicular to the platens of a single sample are >24” (61cm),, then the 4 samples should be placed in a top-bottom orientation as shown fig 2. If, when placed 4-high, any of the samples are completely above the top of the platens, that sample can be removed from clamping in this orientation only(fig 3 shows 3 MHC’s ready for clamp testing with the 4th sample removed from testing in this orientation)
3 Each time the samples are clamped, the force should be applied for a minimum of 15 seconds and not to exceed 1 minute.
4 .Apply the clamp force on the samples with the platens resting on the floor and the samples flush with the front edge of the platens (see fig2). If the samples are too large for the clamps to be flush to front edge, clamp as close to the edge as possible.
5.Clamp the product a total of 10times with the clamps in the flush orientation.
6. Apply the clamp force on the packaged product with the platens in a 2×2 inch offset position(see fig 3). Both the horizontal and vertical offset dimensions are measured at the front bottom corner of the platen. If the package is too large for the clamps to be positioned 2-inches from the front edge, clamp as close to this position as possible.
7. Clamp the product a total of 10 times with the clamps in the offset position.
8. Repeat the flush and 2x2 inch offset camping on all other sides of the product that are identified in the handling graphics as acceptable for clamp handling. Please note, depending on the box geometry, you may use both the side-by-side and top-bottom orientation during clamp testing.

 العربية